Every new shift is a draft that only managers can see. Nobody hears about a shift until you publish it.
1. Add shifts
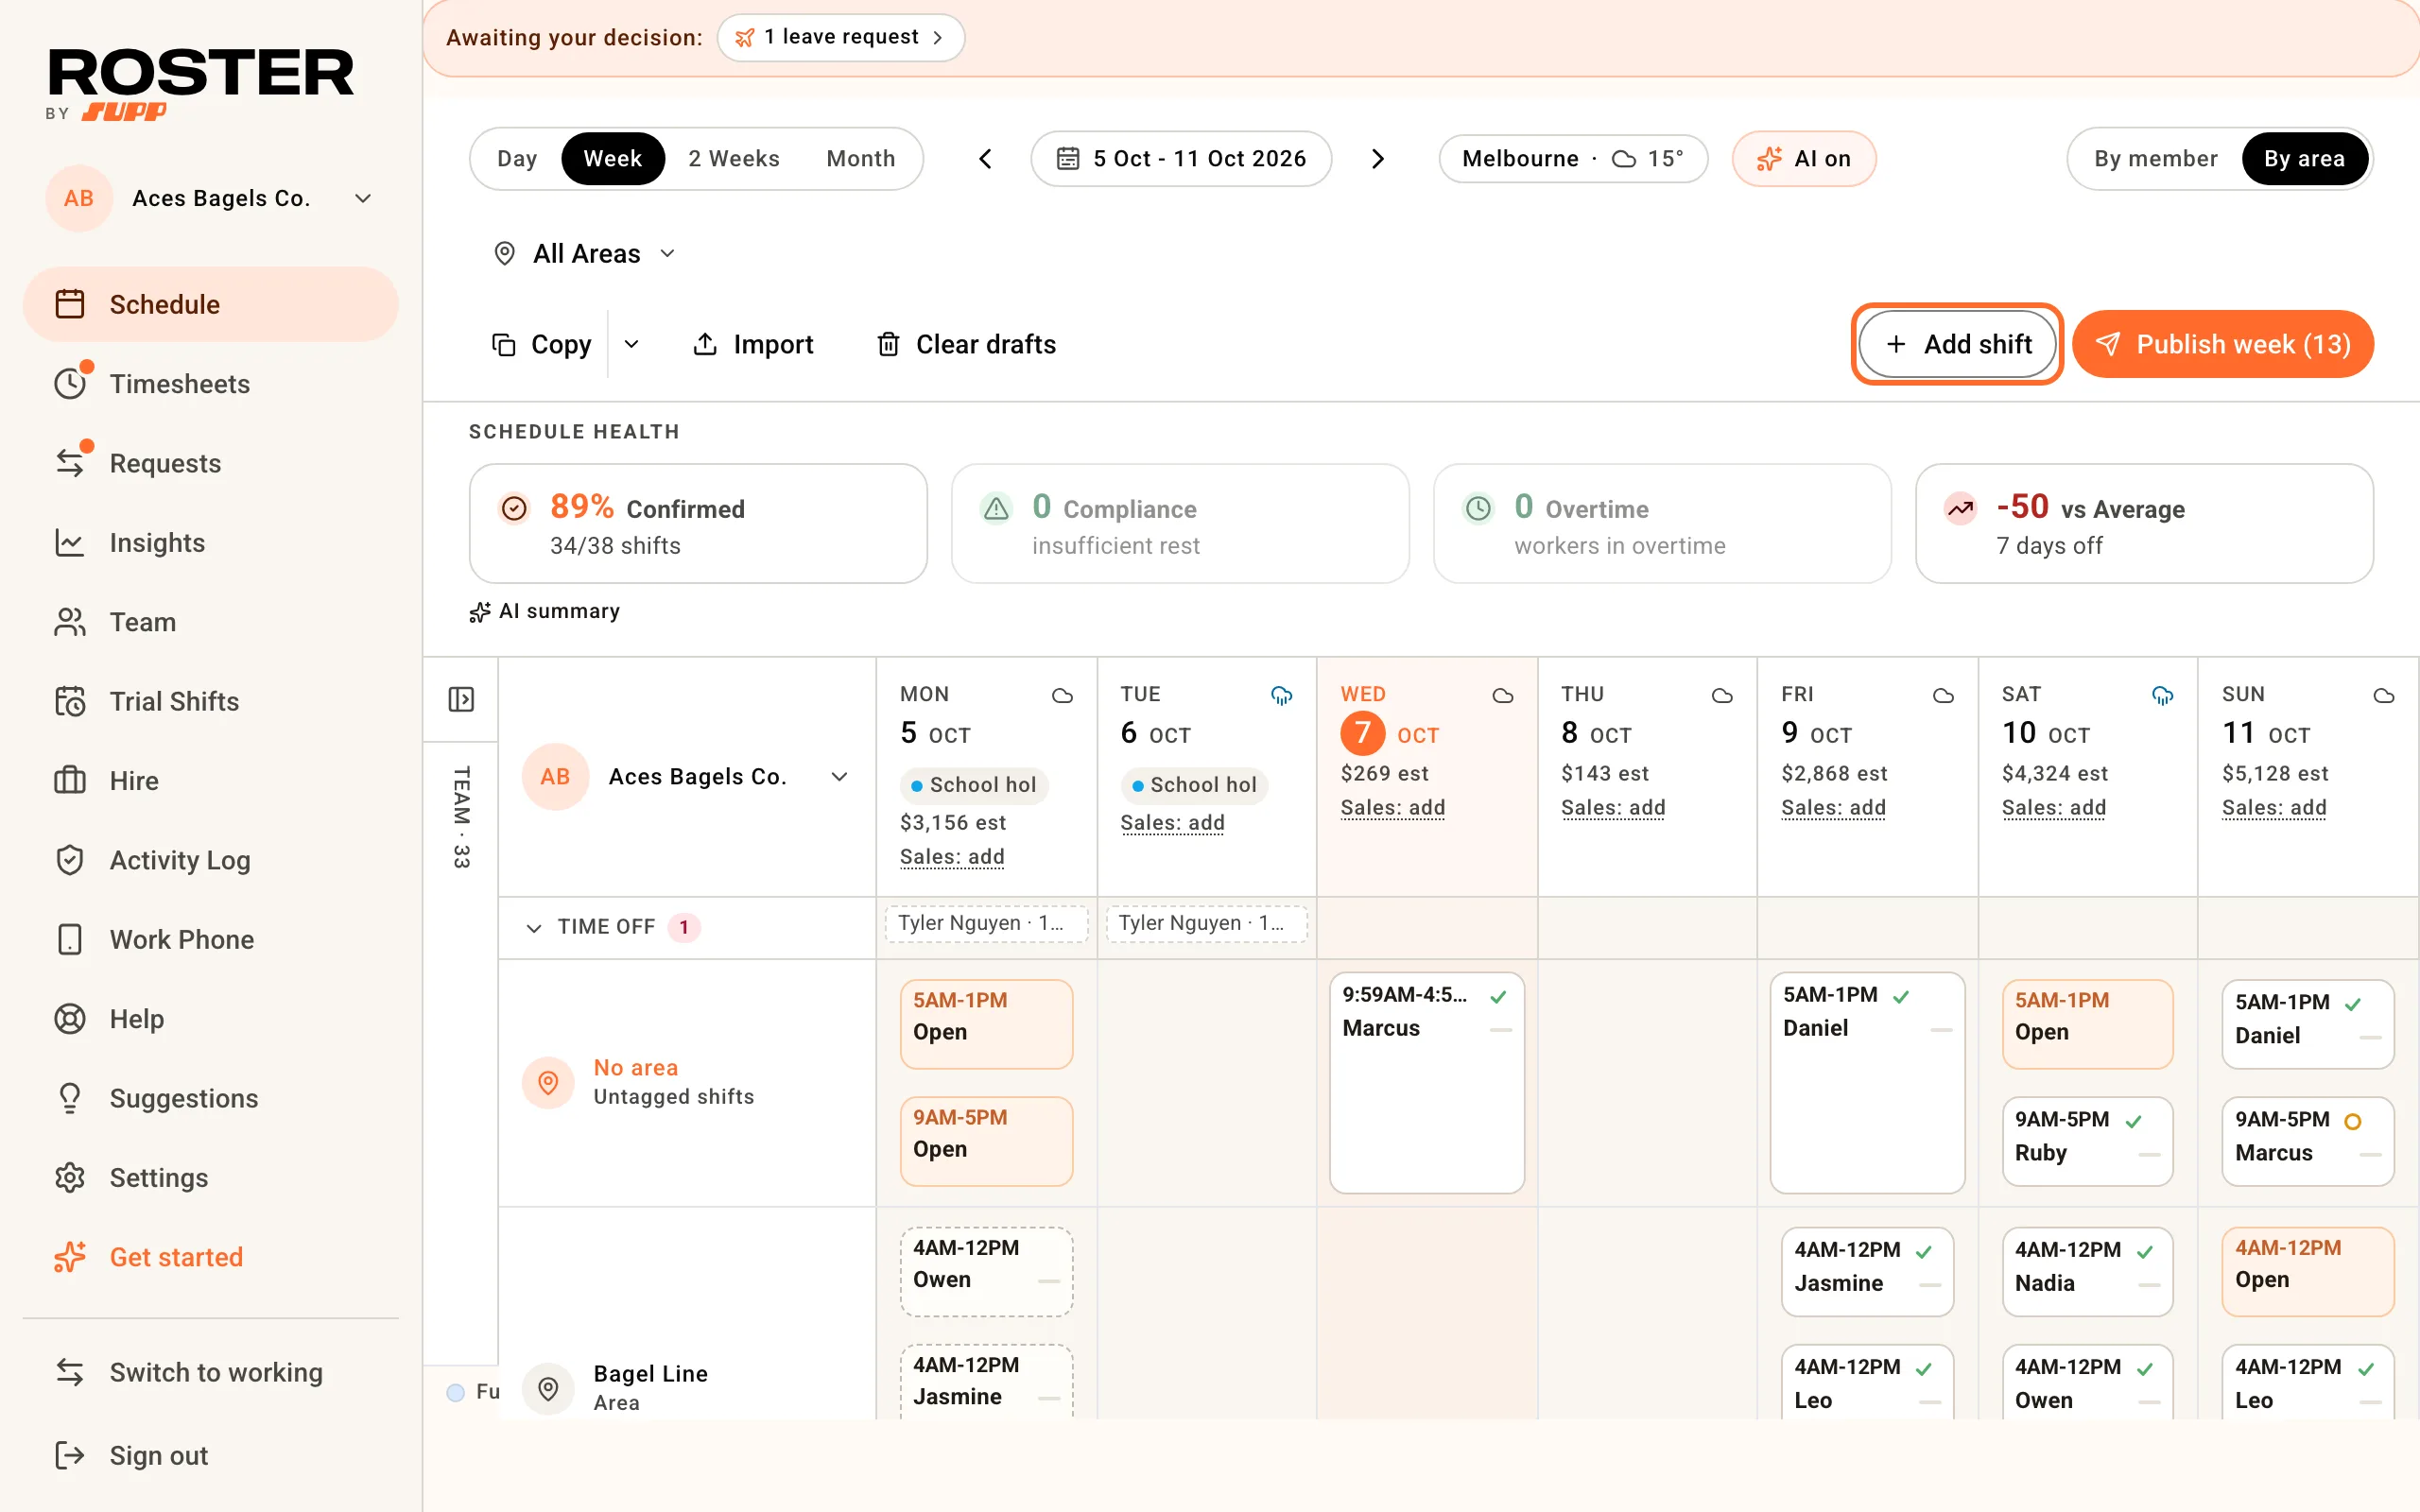
On Schedule, click Add shift, or click an empty day in someone's row.
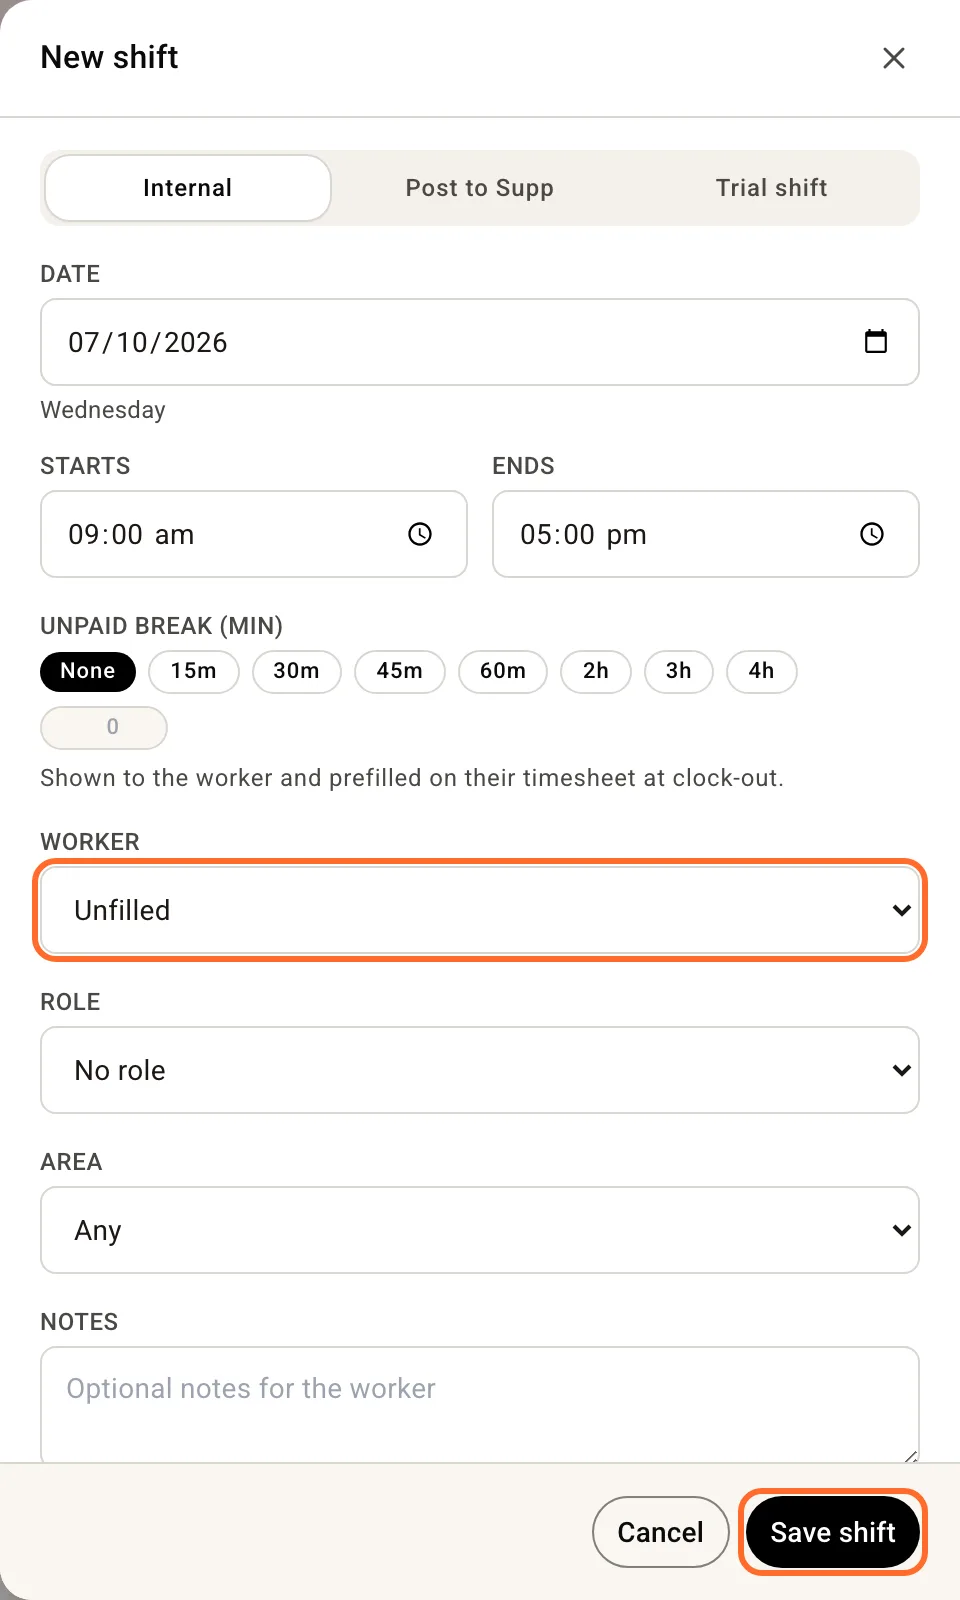
Set the date, start and finish and the unpaid break, then pick the Worker, Role and Area. Quick add suggests teammates who are free; click one to put them on the shift. Leave Worker on Unfilled for a shift nobody has yet. Click Save shift.
2. Or copy a week
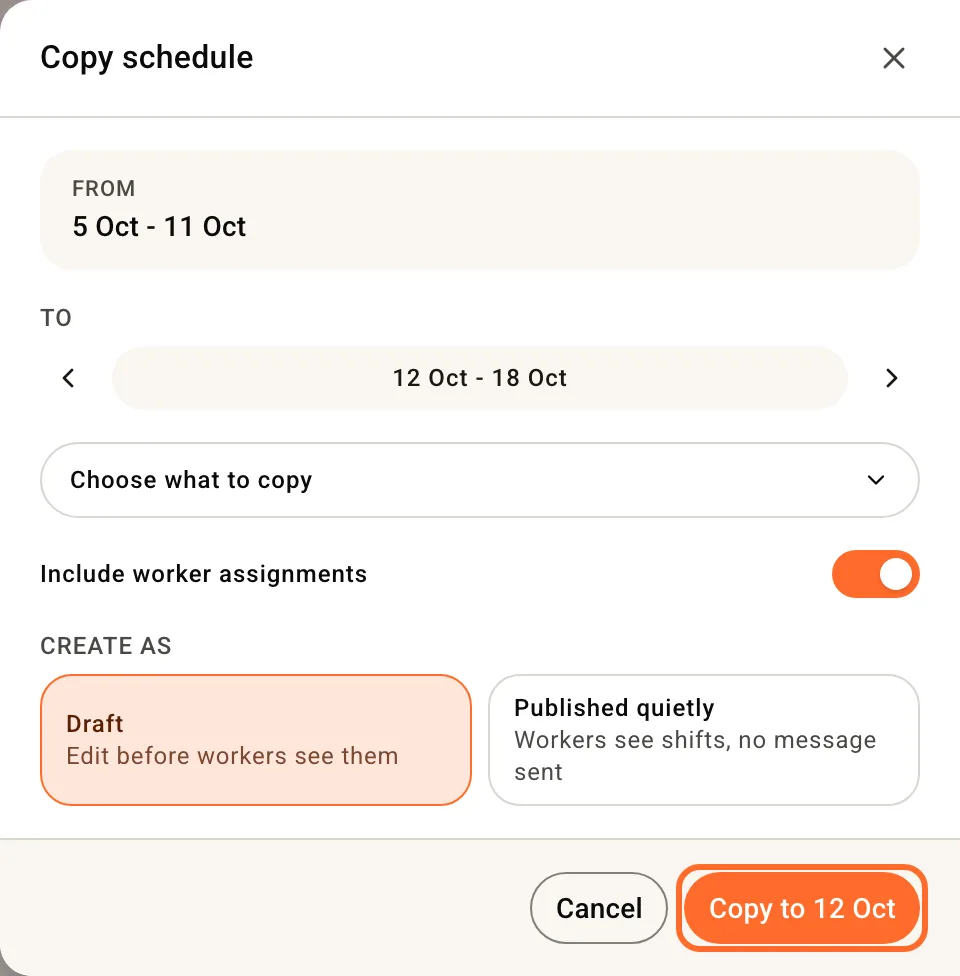
Go to the week you want to copy from and click Copy. To starts on the following week; the arrows pick another.
- Include worker assignments keeps the same people on the same shifts. Turn it off to copy the shifts as unfilled.
- Choose what to copy leaves out areas or people.
- Create as: Draft lets you edit before anyone sees them. Published quietly puts them live without sending anyone a message.
Click Copy to and the date. Copying adds to whatever is already in that week and doesn't check leave or availability, so look over the result before you publish.
Use the same week shape often? The arrow next to Copy has Save this week as template…, and lists your saved templates to apply to the week on screen.
3. Check the drafts
Drafts have a dashed border. The colours and corner icons are explained in Schedule colour coding. Clear drafts deletes the week's drafts if you want to start again.
4. Publish
Click Publish week. The number in brackets is how many drafts the week holds. (In 2 Weeks and Month view it reads Publish 2 weeks and Publish month.)
The dialog shows each week's shifts, hours, people and open shifts, and how many workers will be notified. Choose who to publish holds back areas or people: anything unticked stays in draft and nobody on it is messaged. Click Publish & notify to send.
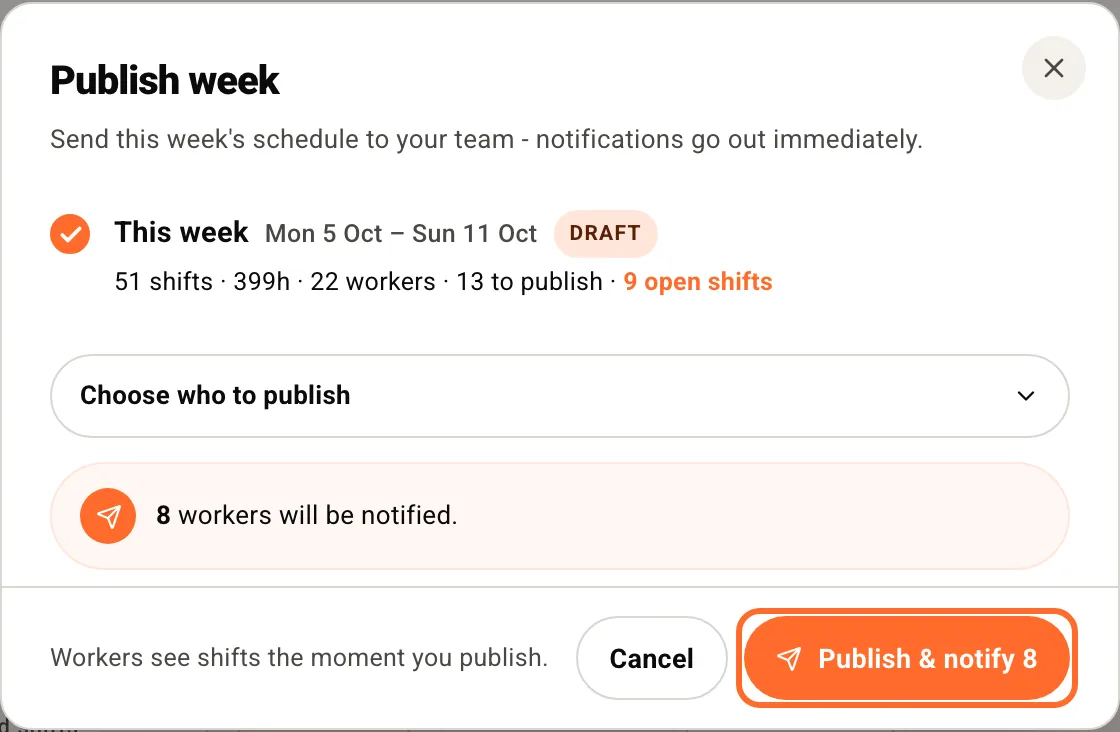
If any shift has a compliance flag, such as too little rest between shifts, Roster lists them first. They are advisory: Go back to fix them, or Publish anyway & notify.
What your team gets
Each person with a newly published shift gets:
- A text listing their shifts for the week, with a link that opens them in Roster
- An email, "You're on the schedule.", with a button to confirm all their shifts at once
They answer each shift in the app with I'm in or Can't make it. I'm in shows as a green tick on that shift on your schedule. Can't make it puts the shift back on Unfilled and tells you straight away: see Swaps and sick calls.
- Only drafts trigger messages. Shifts that were already published aren't sent again.
- No texts between 10pm and 7am at your venue. They aren't held for the morning either; the email still goes. Publish in the day if your team relies on texts.
- Each person's own notification settings apply, so someone who turned off texts gets the email only.
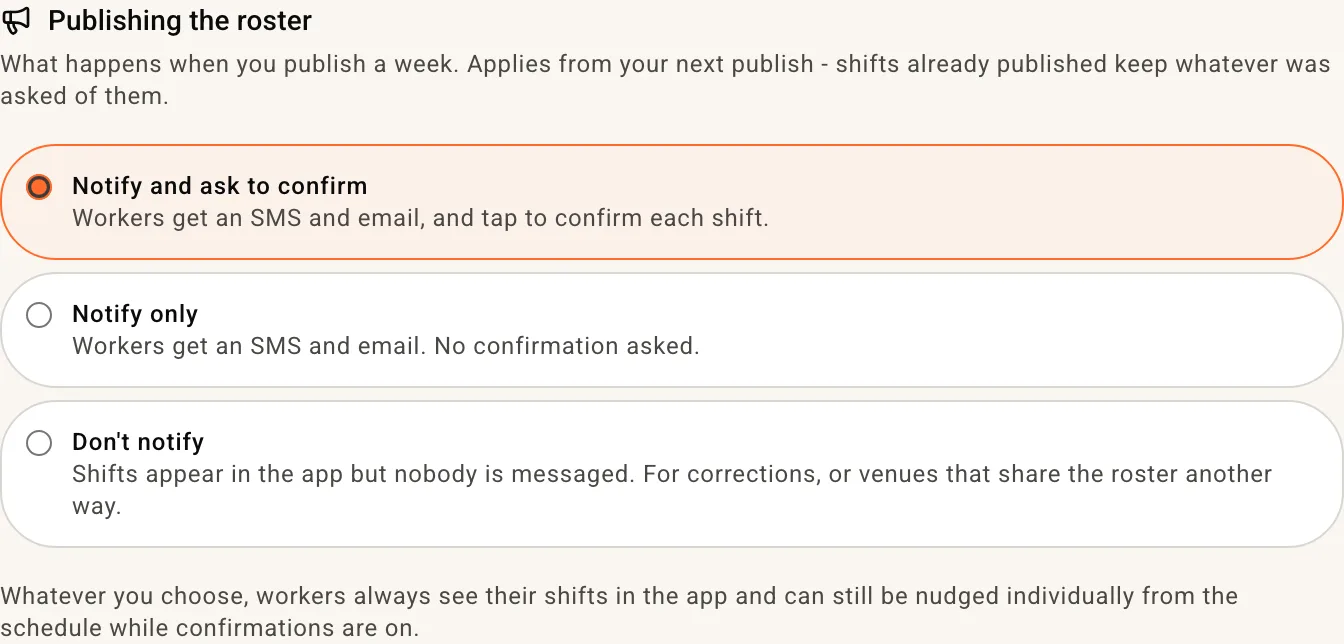
That is the default. To change it, open Settings, Scheduling and pick under Publishing the roster: Notify only sends the same messages without asking anyone to confirm, and Don't notify sends nothing. It applies from your next publish.
Changing a published shift
Click the shift, change it and click Save. It stays published. A new time or role tells the worker straight away; note and area changes are quiet. Moving the shift to someone else tells both people.
Published the wrong week? In Activity Log, find "published the schedule" and click Revert. The shifts go back to draft and the workers on them are told. Shifts that already have hours recorded stay published.
Related
- Schedule colour coding
- Swaps and sick calls - when someone can't work a shift you published
- Set up clock-in