Every clock-in makes a timesheet, and nothing reaches payroll until you approve it. Use a laptop or desktop: on a phone or tablet, Timesheets has a simpler layout without Group by employee, bulk approve or Export.
1. Pick the period
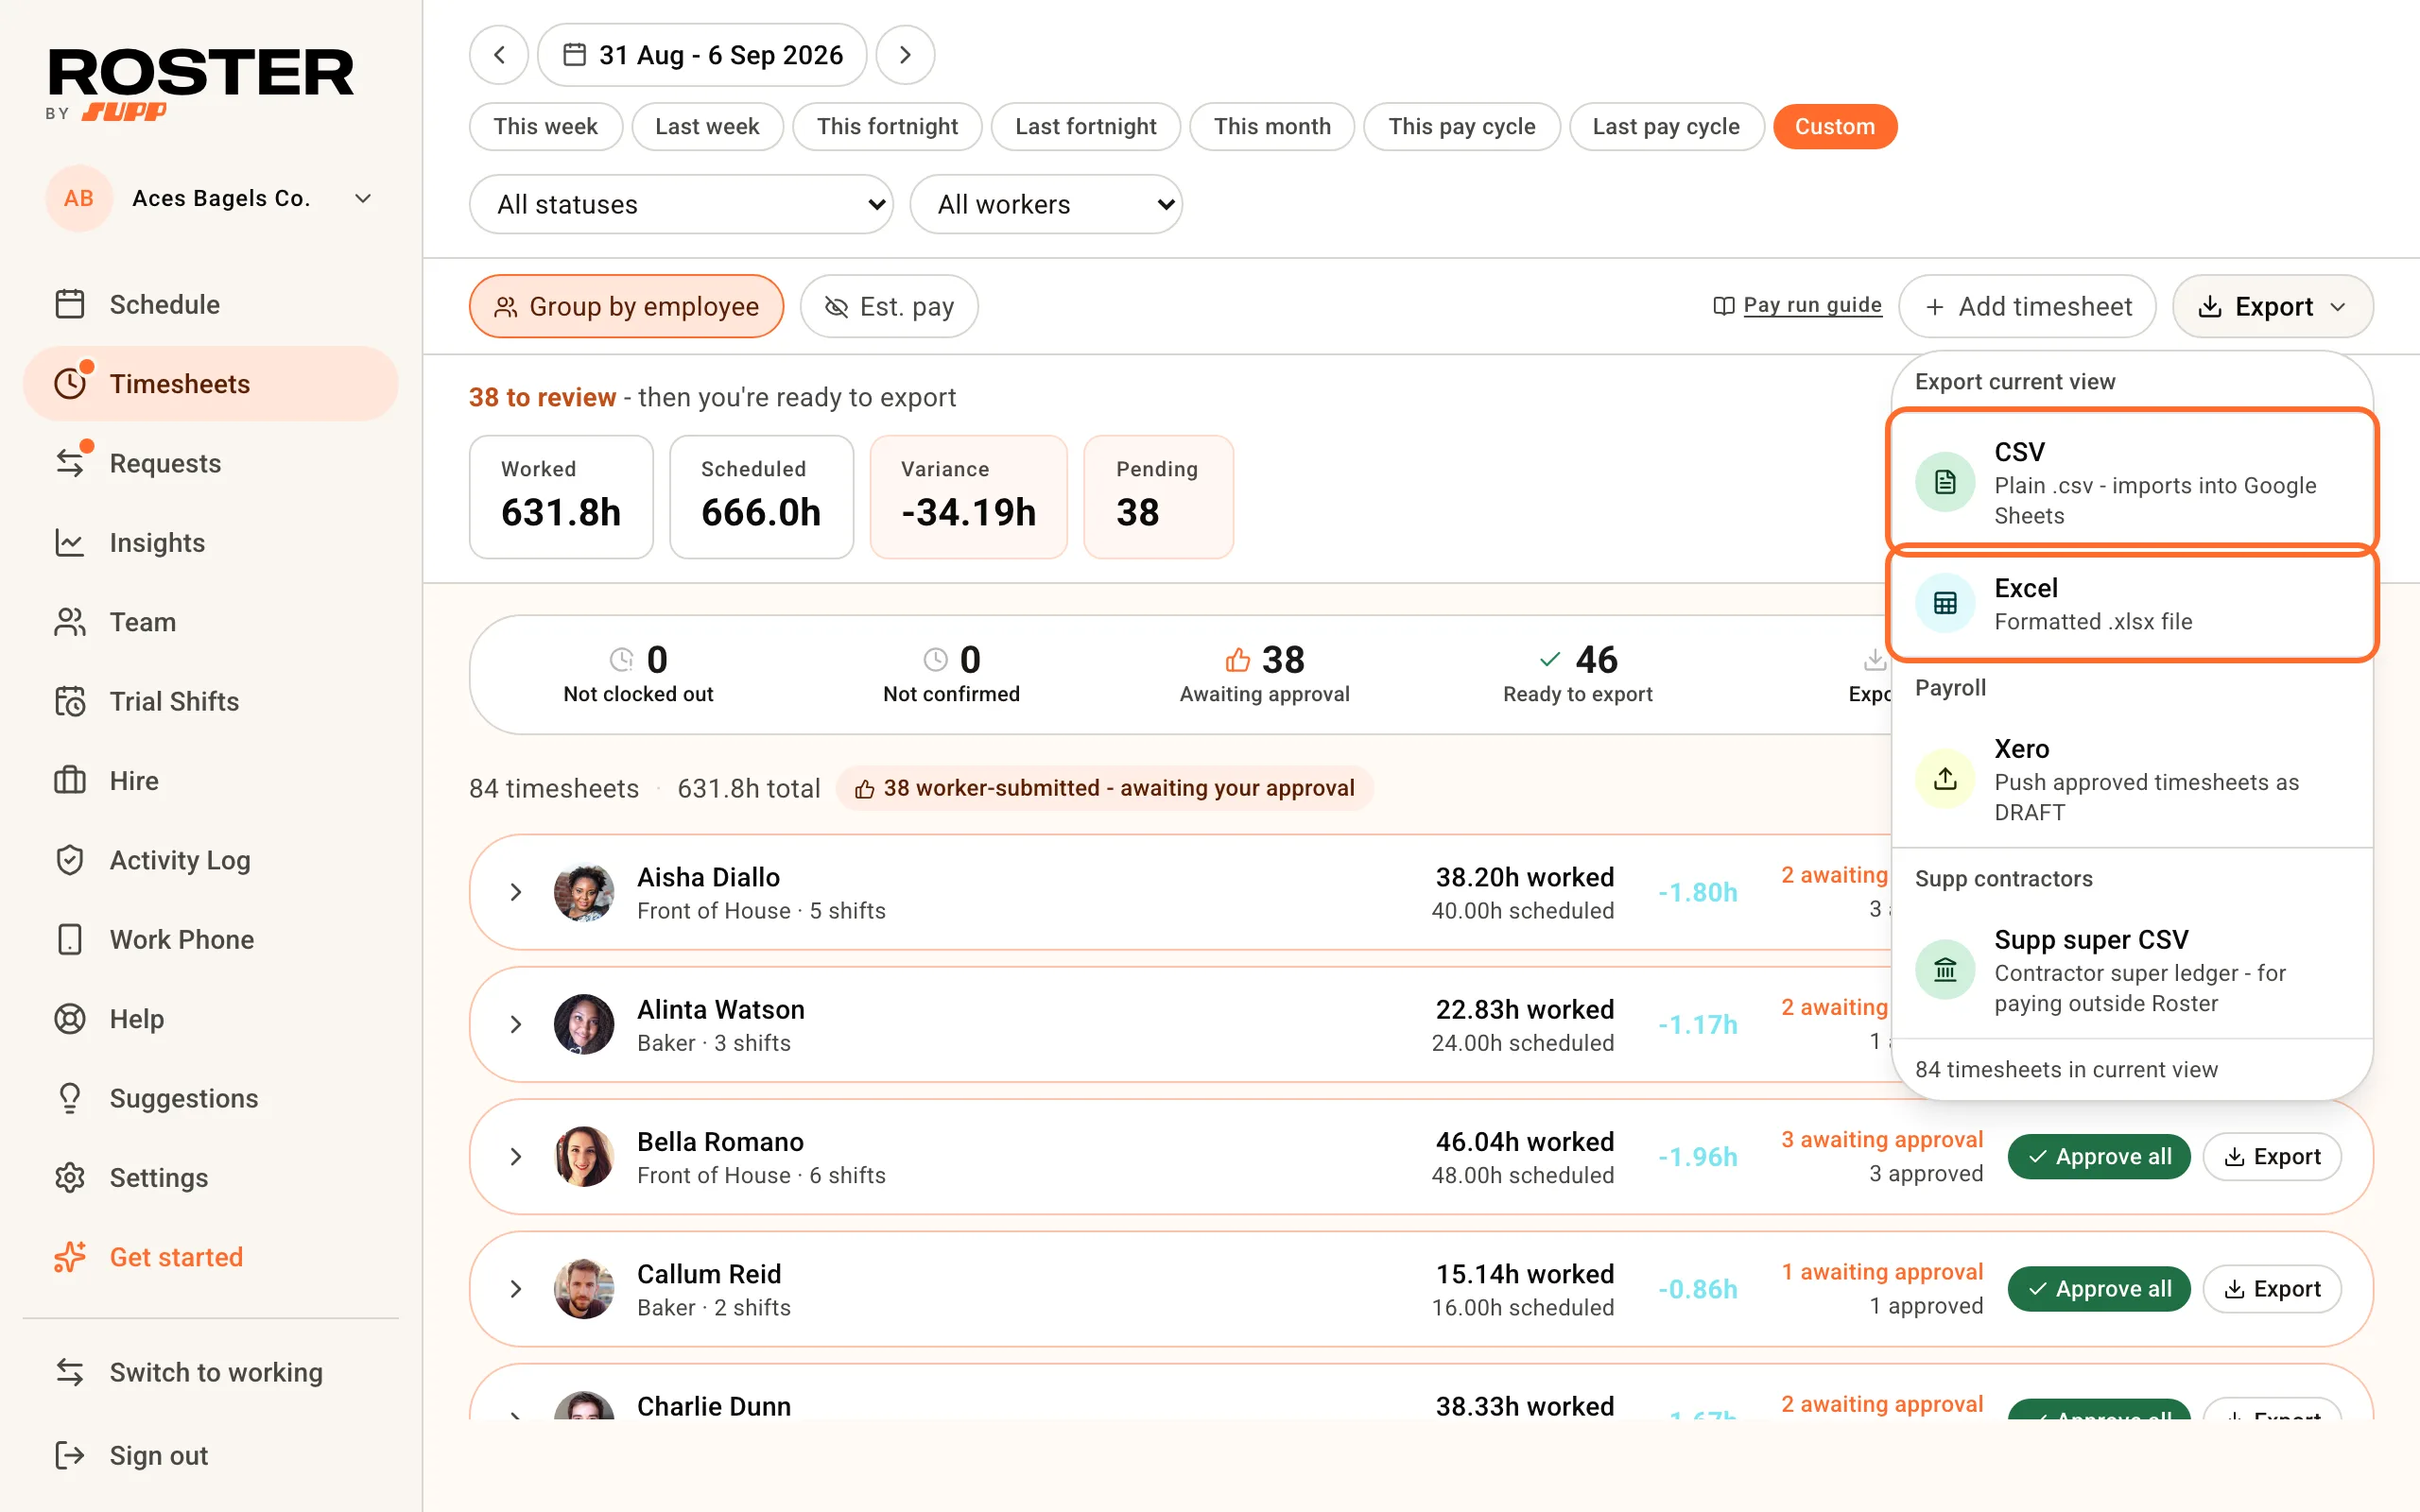
Open Timesheets and pick a range: This week, Last week, This fortnight and so on, or Custom. Once your pay cycle is set in Settings, Business profile, This pay cycle and Last pay cycle line up with your pay run.
2. Read the counters
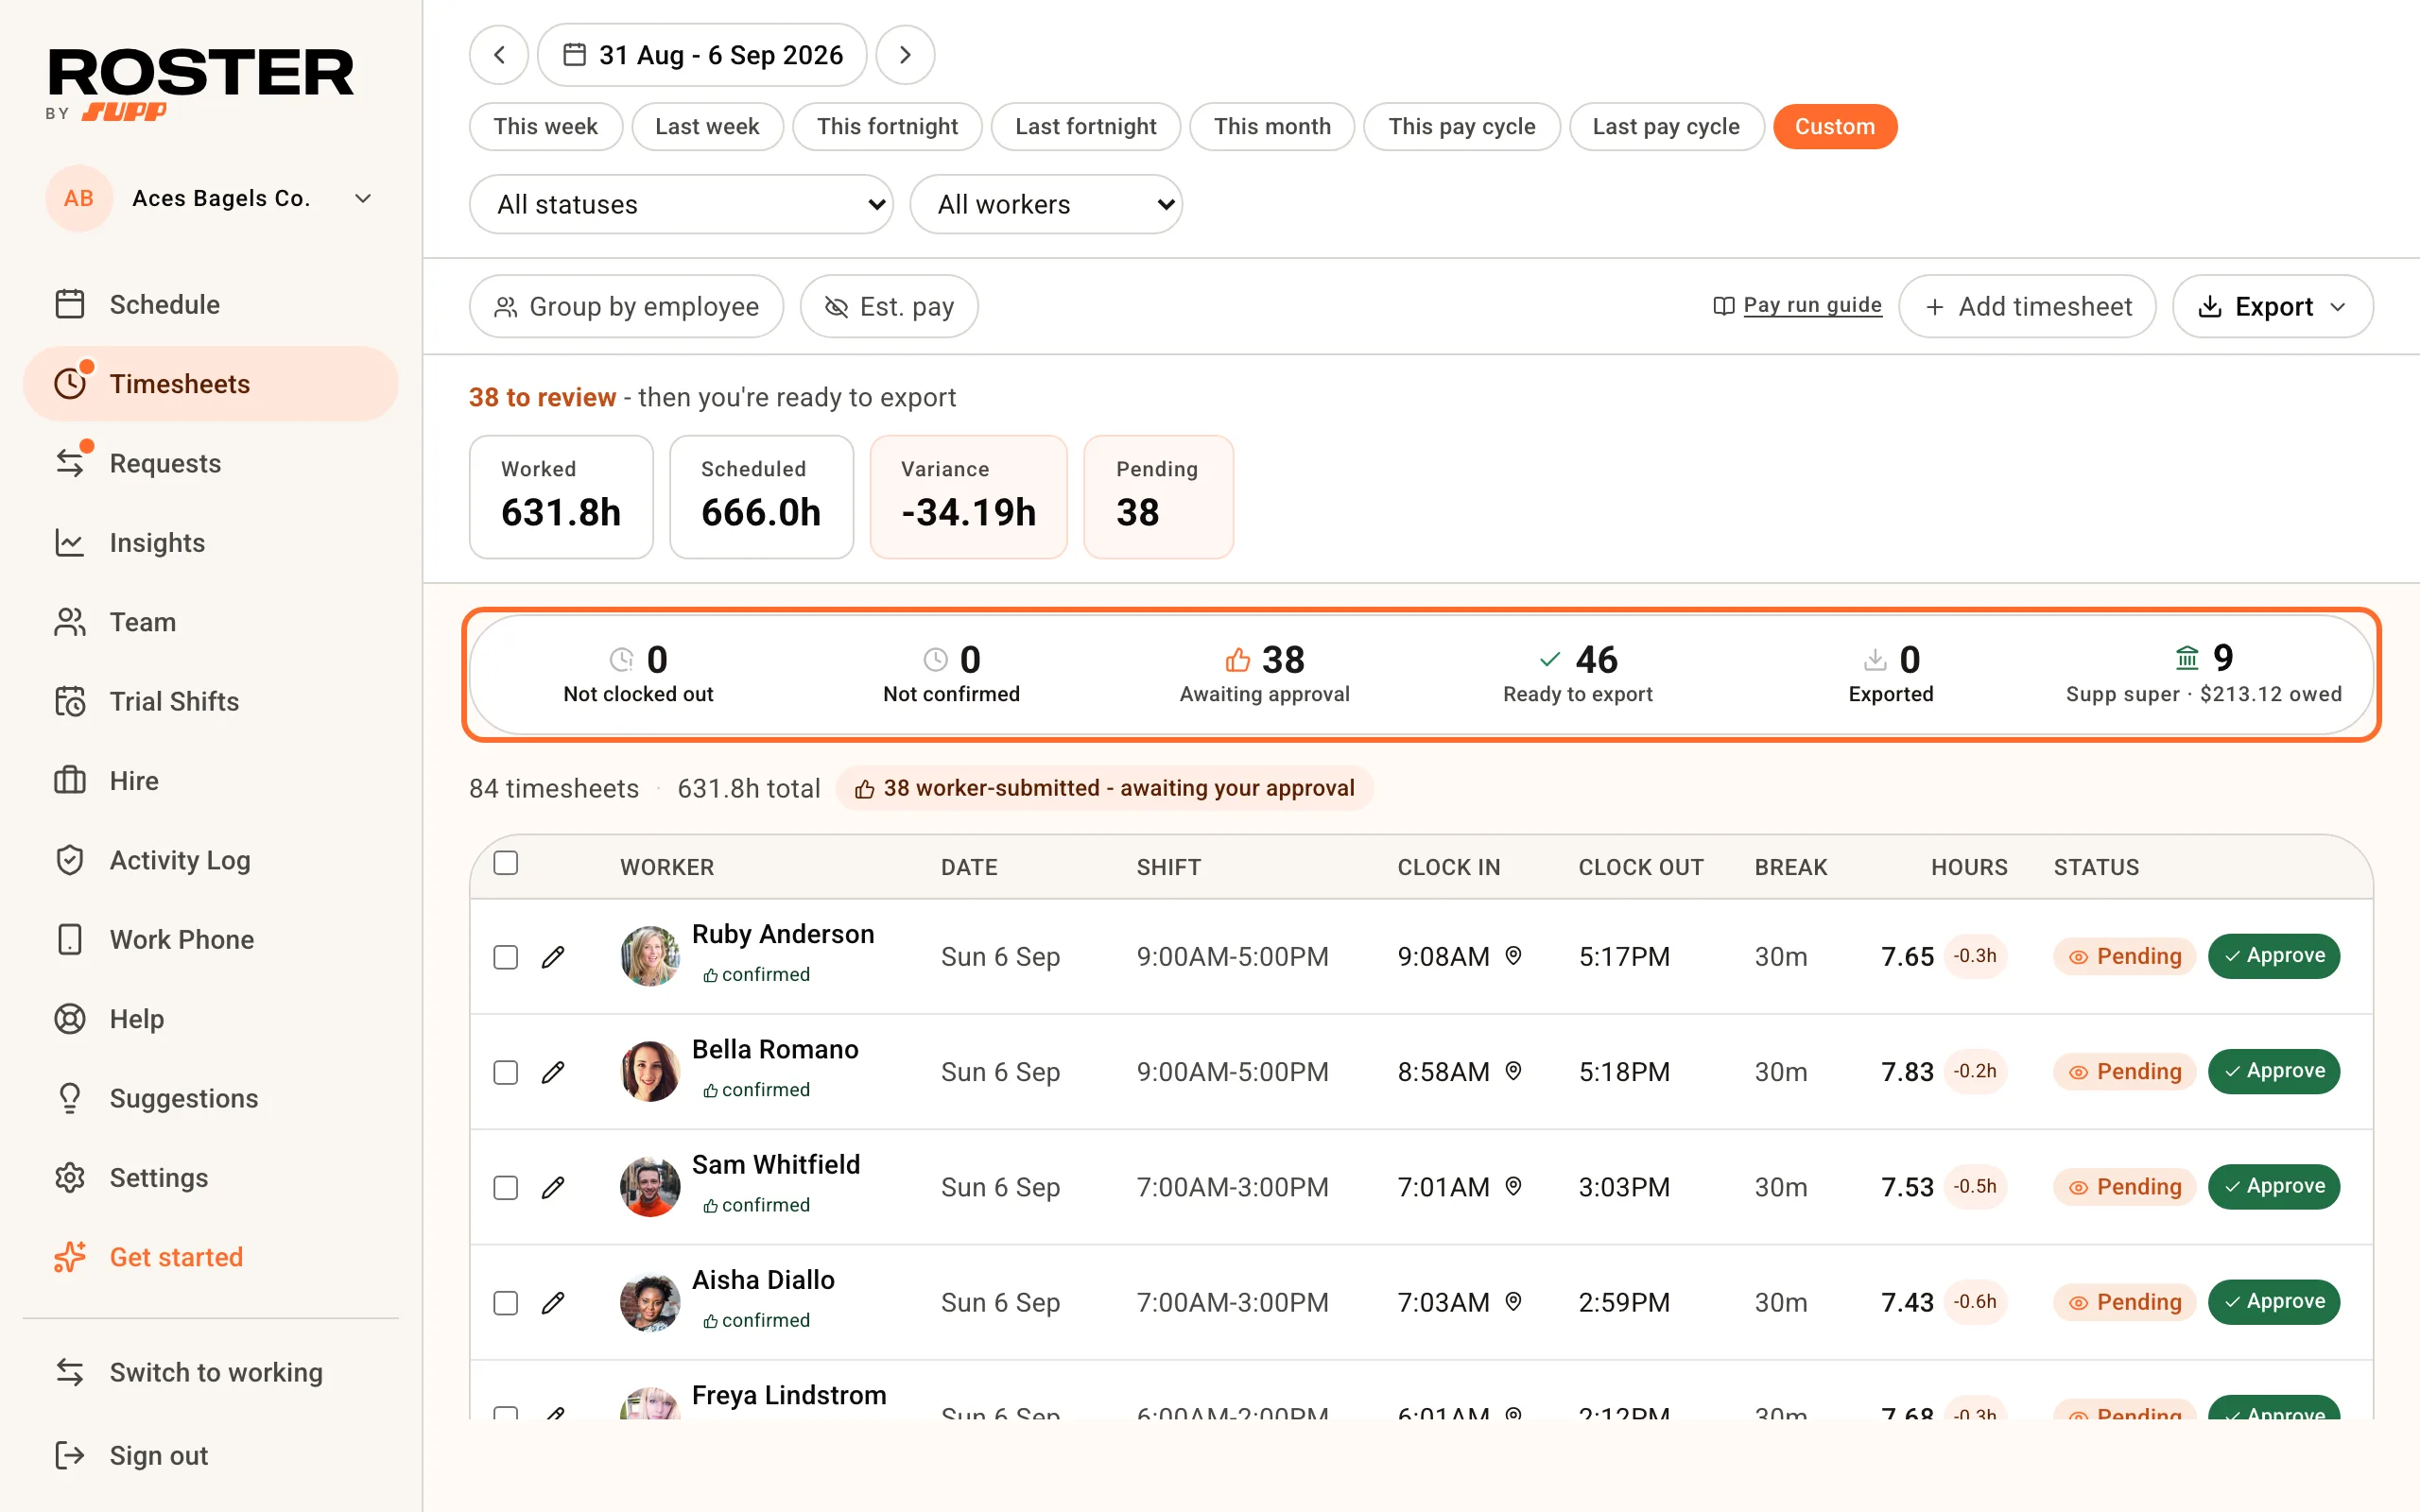
A timesheet moves left to right along the counters:
- Not clocked out - clocked in, no finish time yet.
- Not confirmed - both times are in, but the worker hasn't confirmed them.
- Awaiting approval - the worker confirmed. Your turn.
- Ready to export - approved.
- Exported - sent to Xero, MYOB or Employment Hero.
Click a counter to show only those timesheets, and again to show everything. The line above the totals says what's left, and reads "All clear - nothing blocking this payrun" when you're done.
3. Approve
Each timesheet with both times has a green Approve on its row. To check it first, click the row: the panel shows hours worked against rostered, and each clock time against the roster.
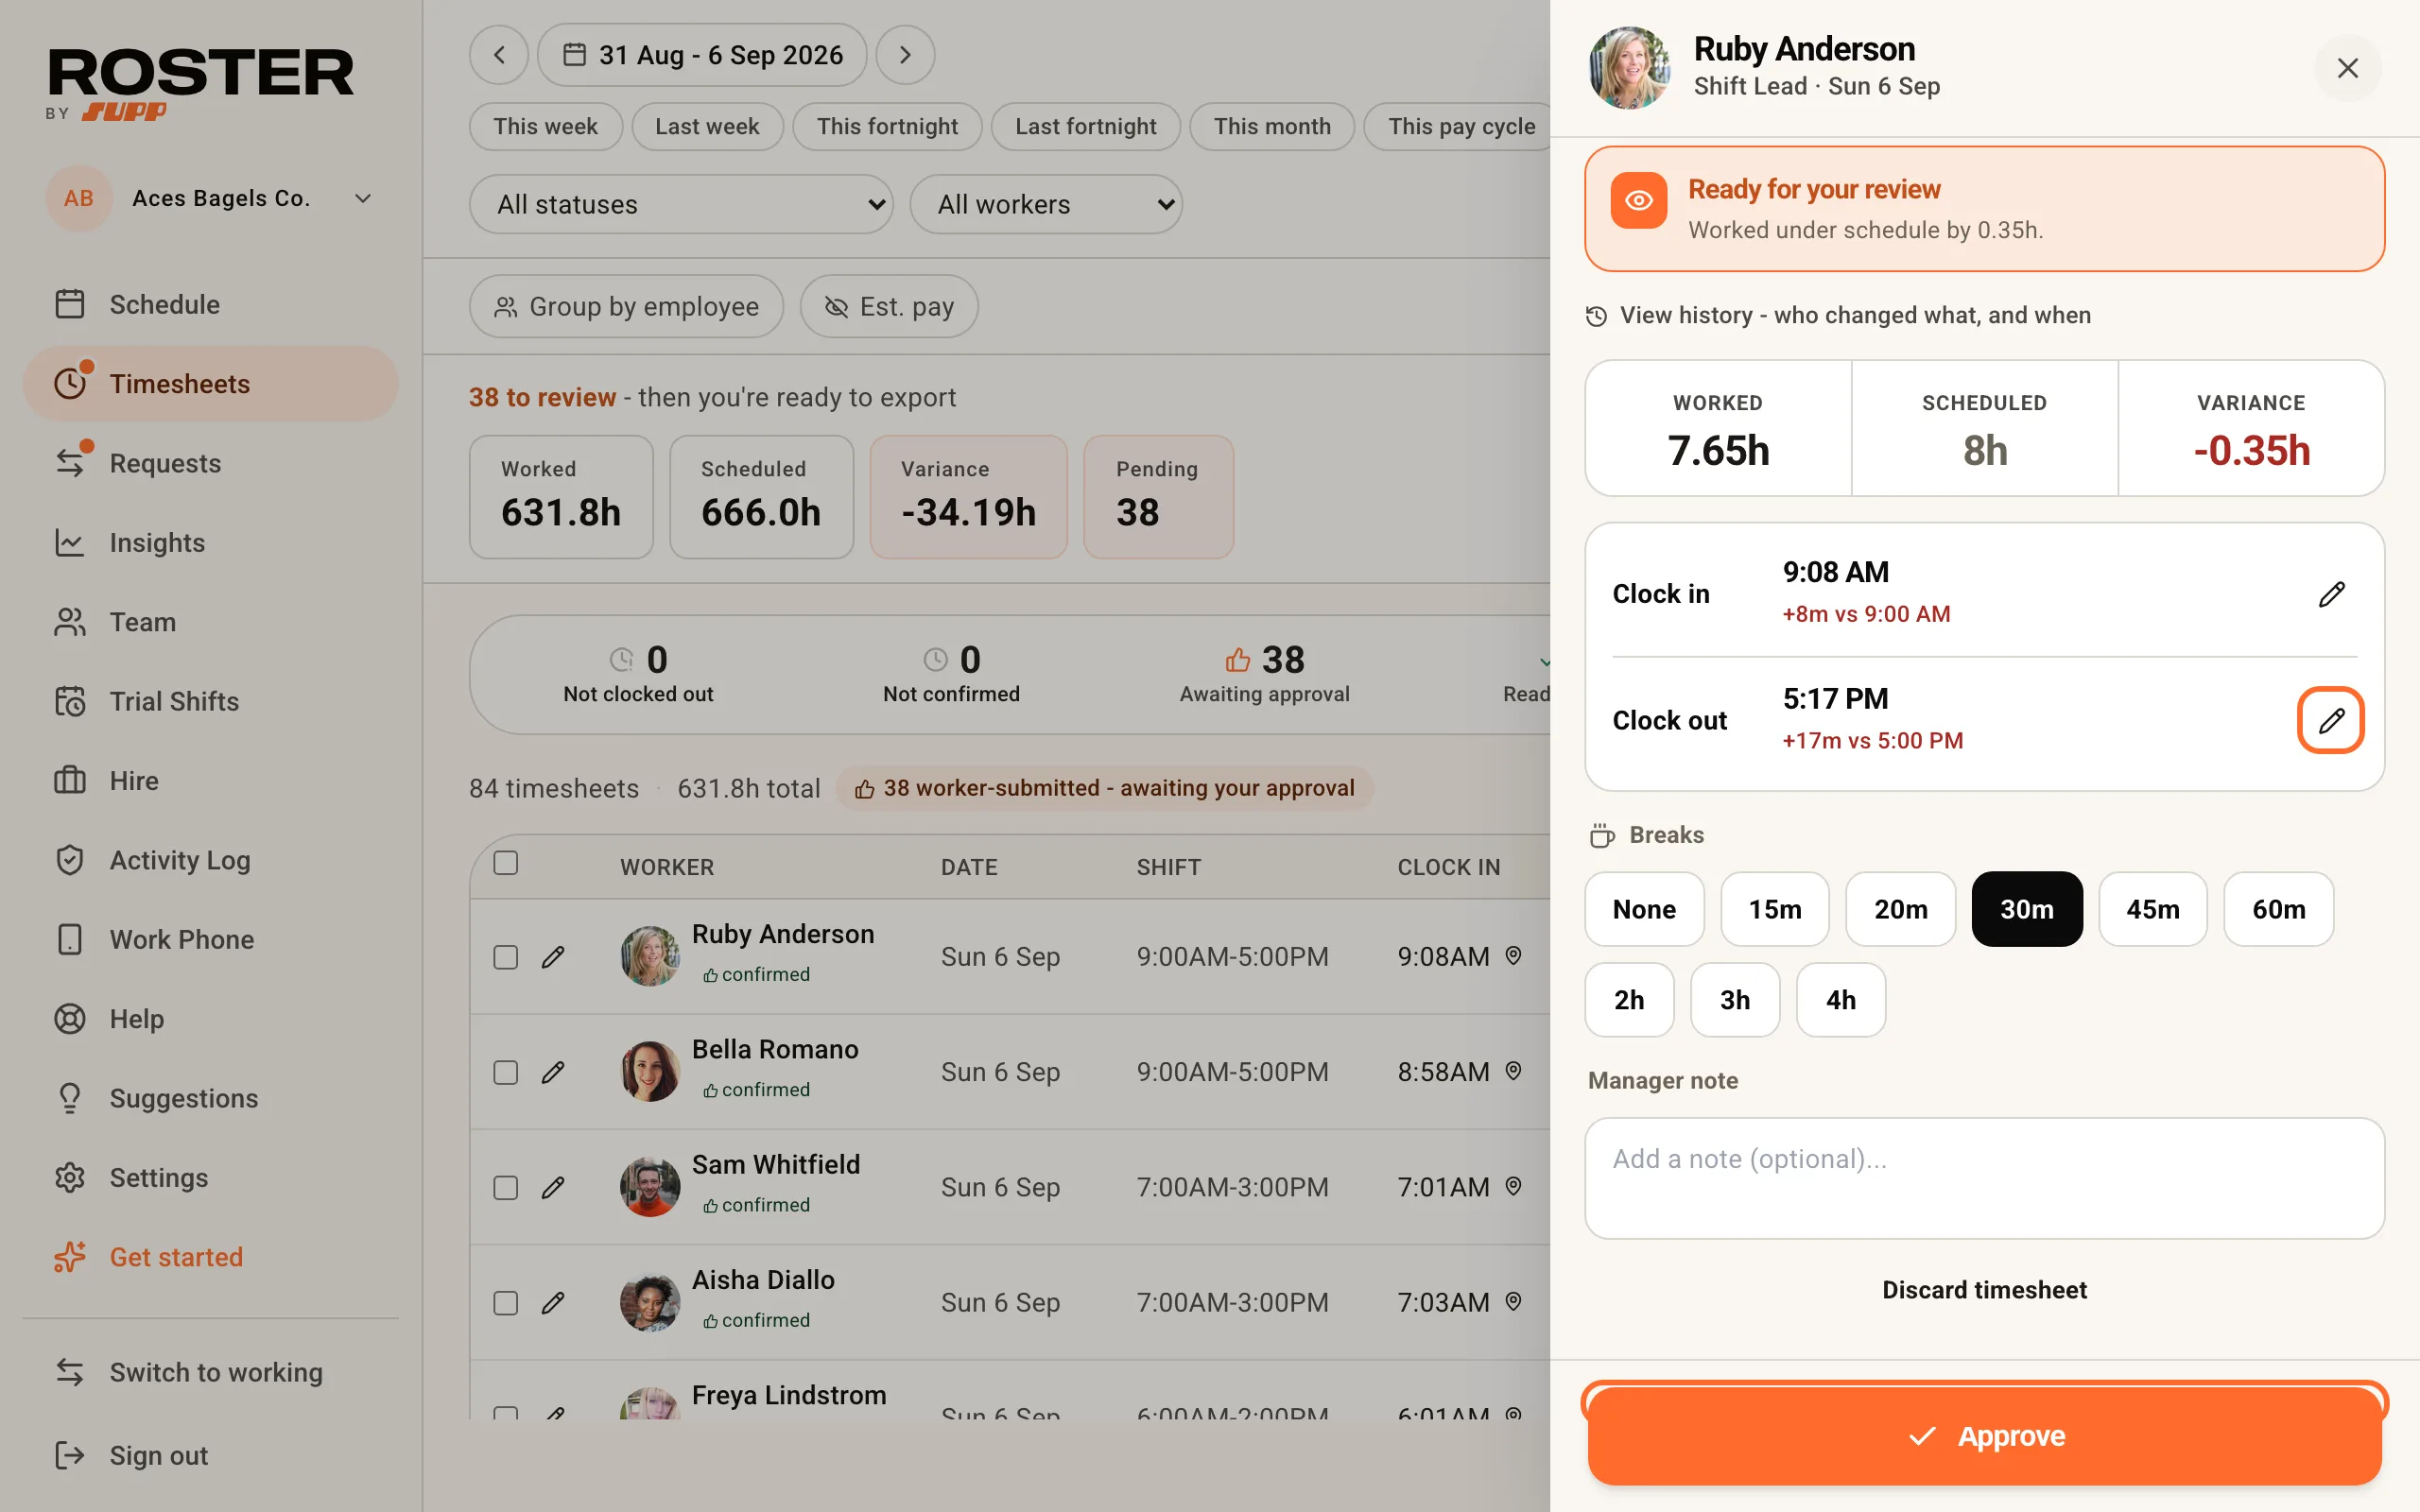
Wrong time? Click the pencil next to Clock in or Clock out, enter the right one, then Approve: the fix saves with the approval. To change hours without approving, use the pencil at the start of the row and Save. A changed time keeps "clock said" and the original punch beside it.
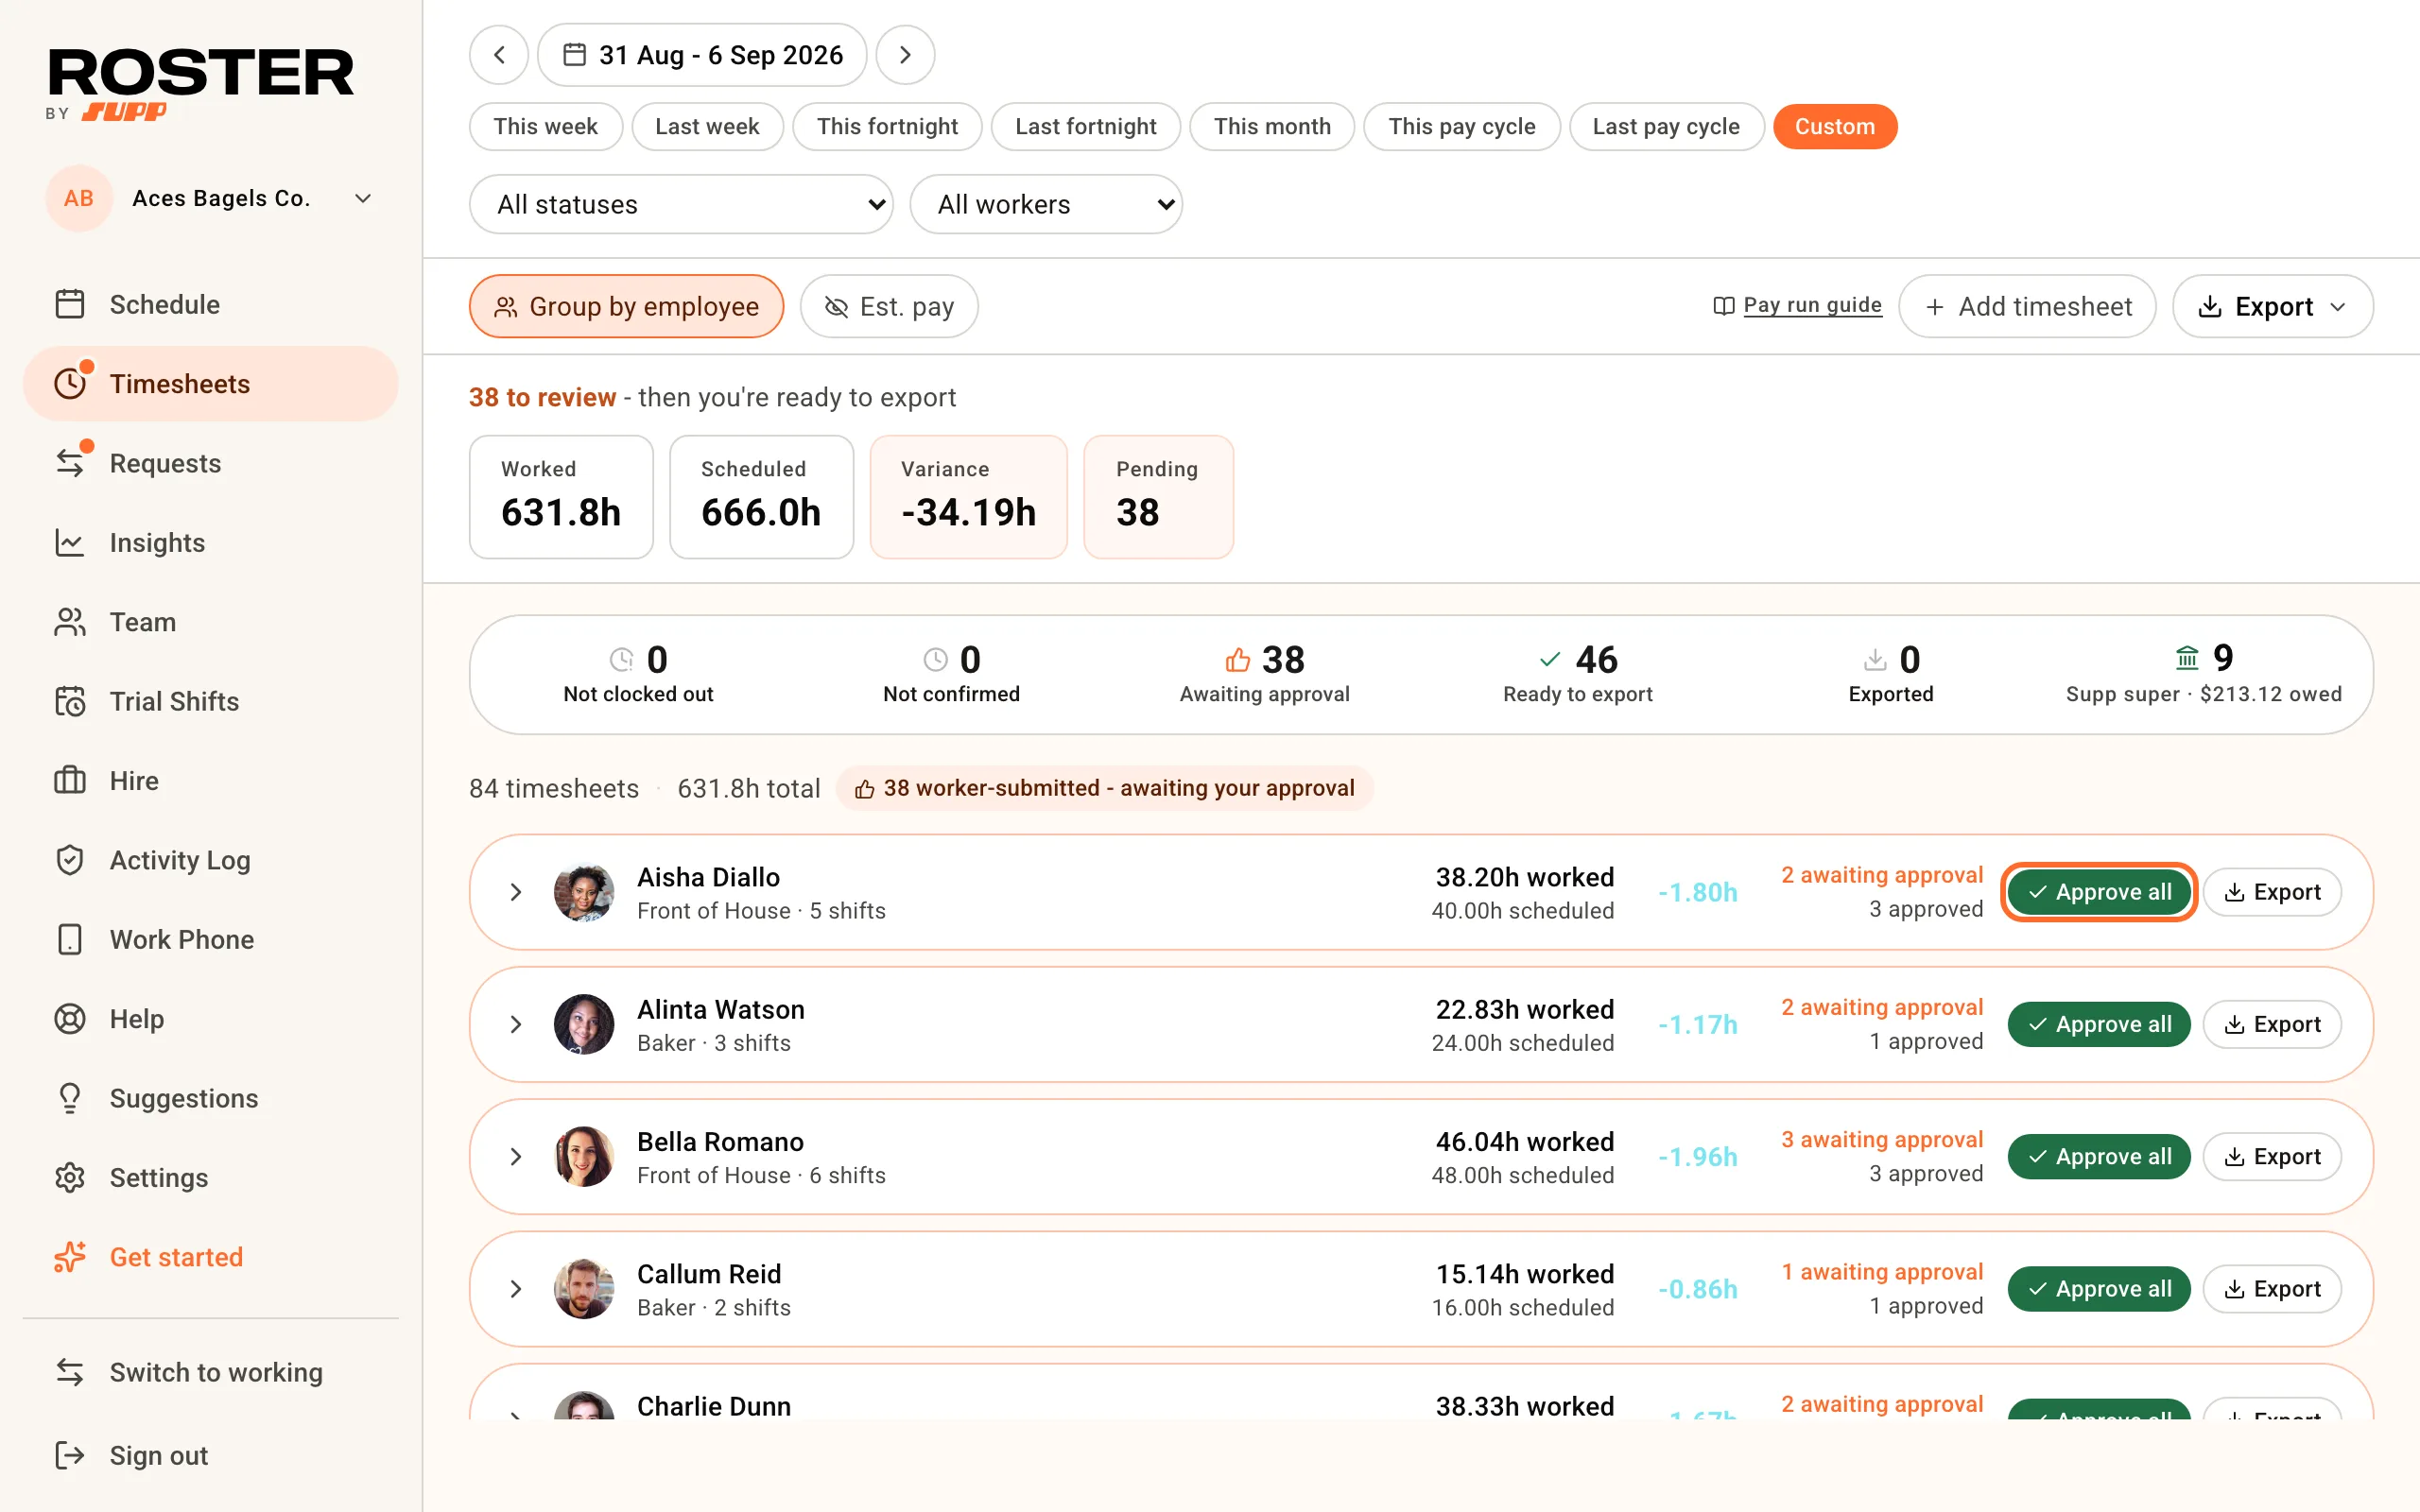
To approve someone's whole period, turn on Group by employee and click Approve all on their line. It approves every timesheet of theirs with both times in, and skips any still clocked in.
You can also tick rows and click Approve selected. "worker-submitted - awaiting your approval" above the table selects every timesheet waiting on you.
Approved one by mistake? Open it and click Undo approval. Editing an approved timesheet sends it back for approval too. Only exported timesheets are locked.
4. Fix a missed clock-out
Someone who forgot to clock out sits under Not clocked out. Open their row, enter the finish time under Clock out, and click Clock out & approve.
Leave it, and 12 hours after the shift ends Roster closes the timesheet at the rostered finish and emails the worker. It then shows under Not confirmed tagged auto clocked out: check the real finish time before you approve it.
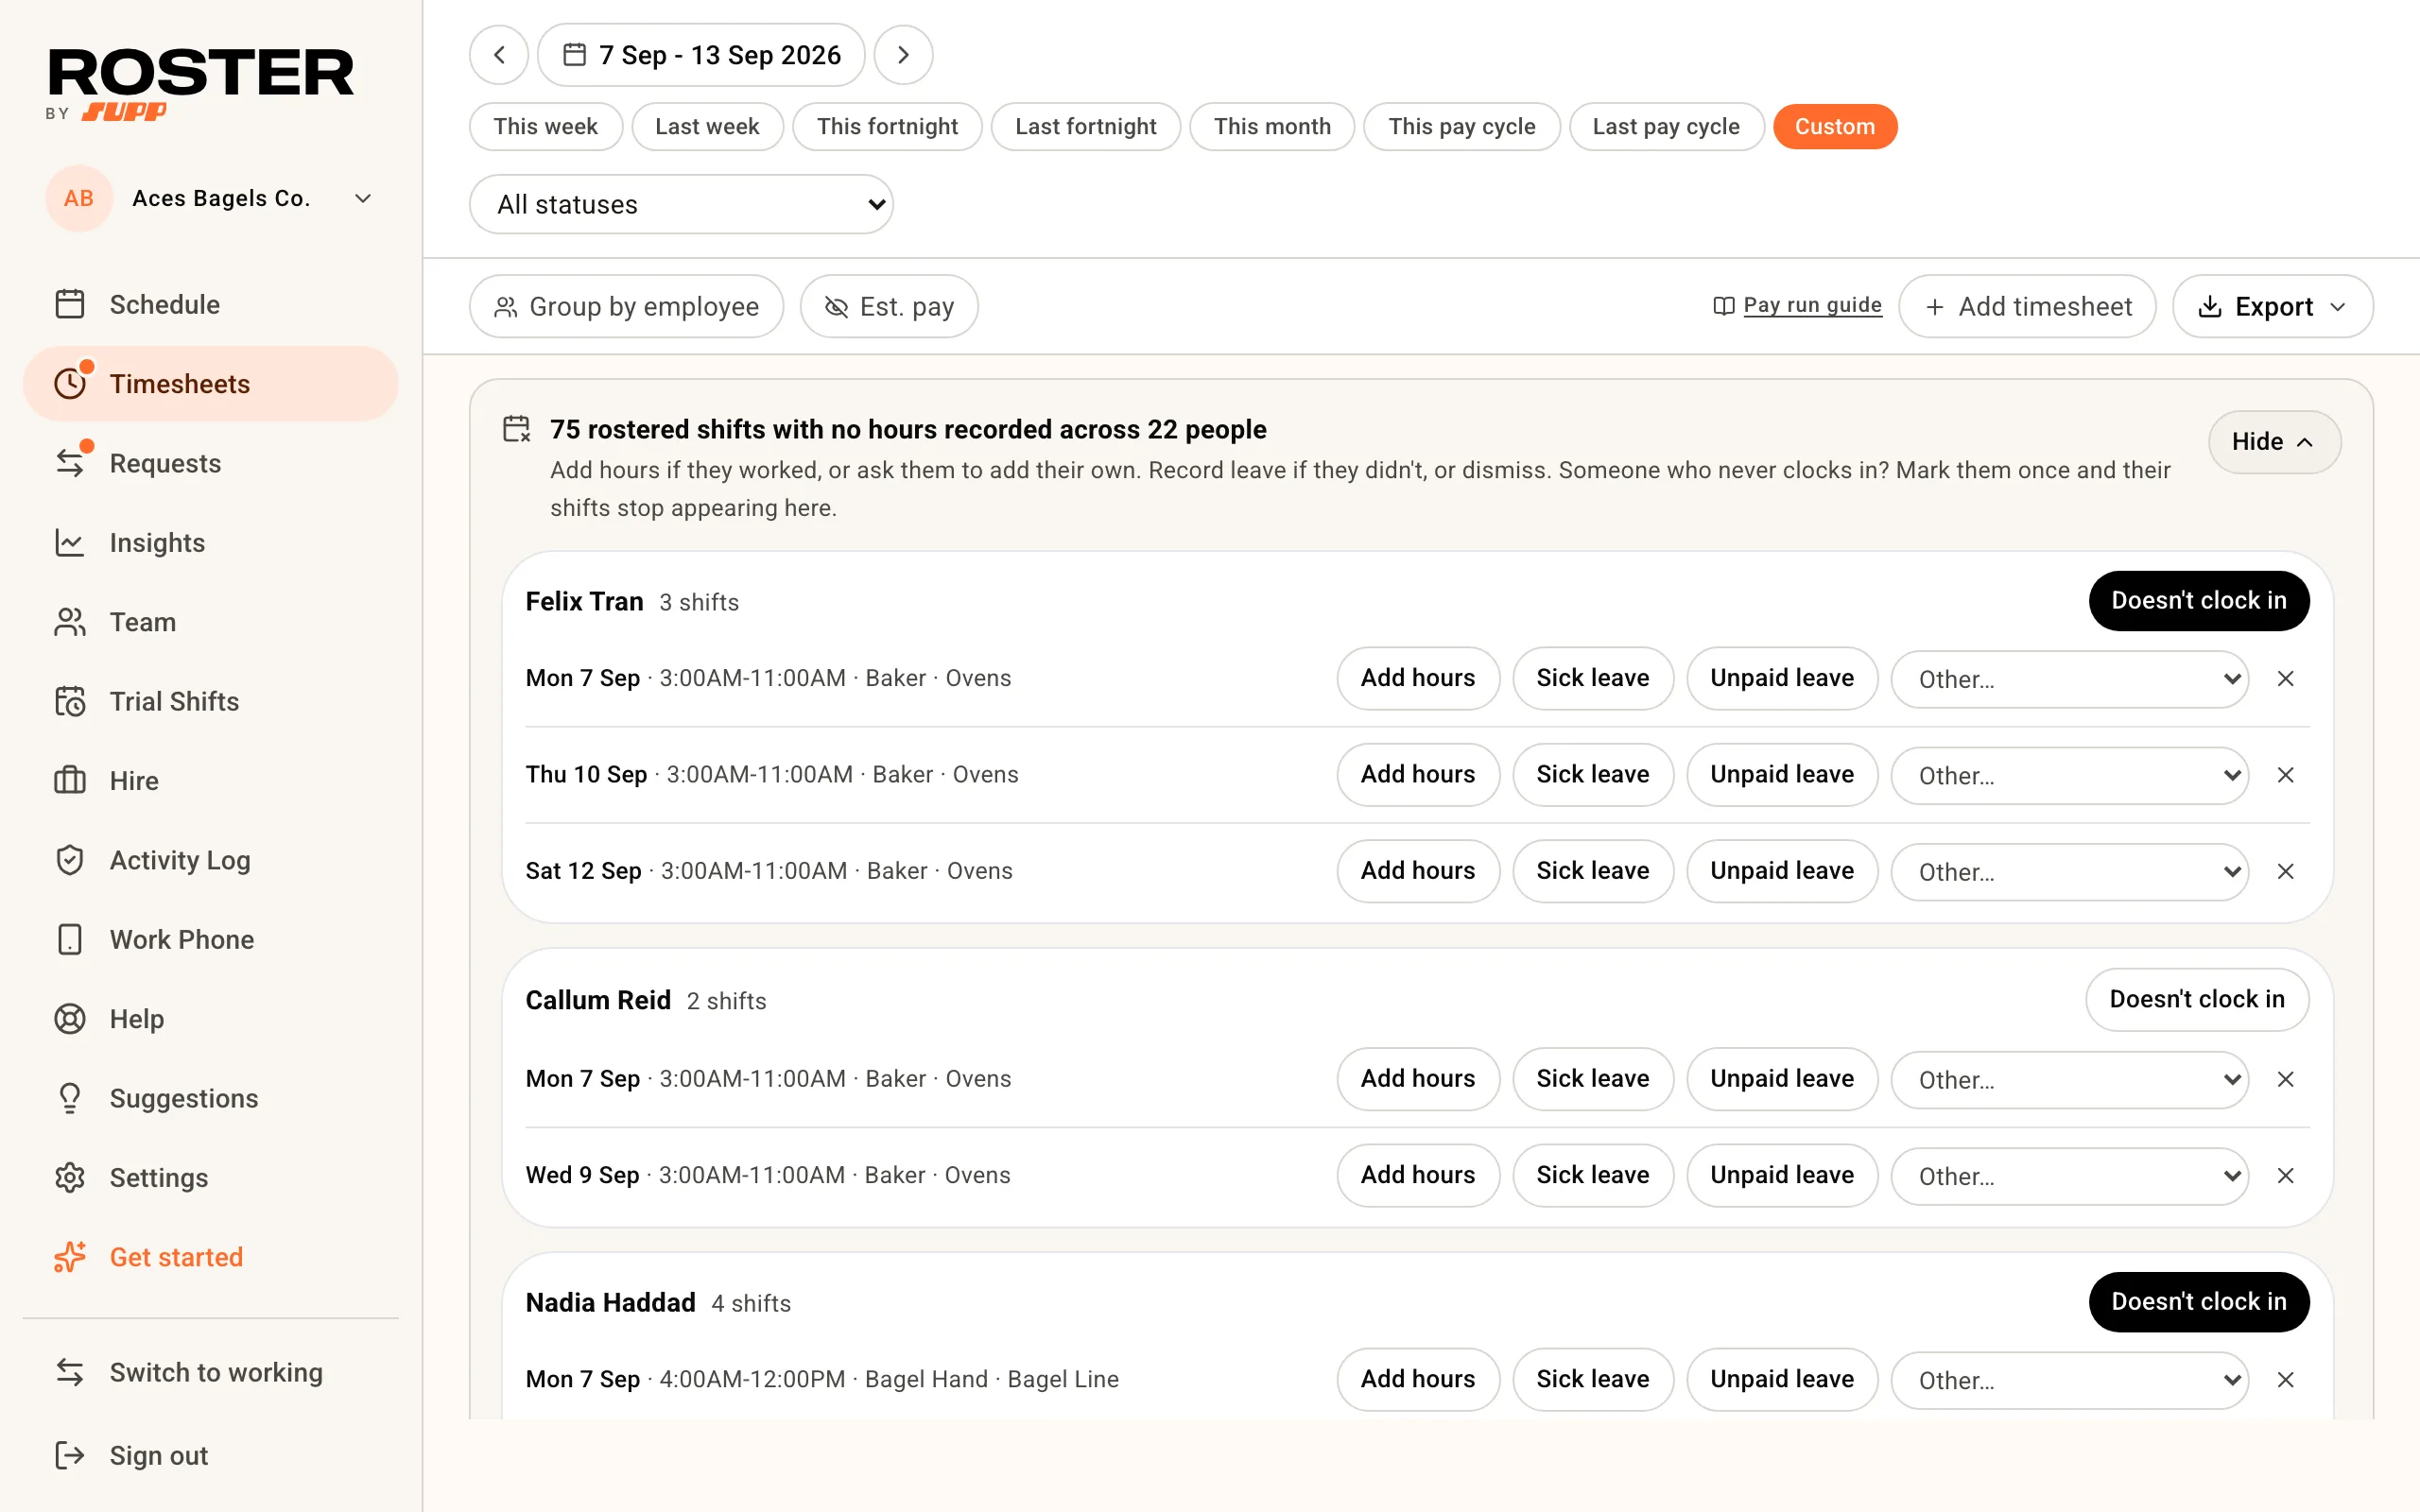
Worked but never clocked in at all? Add timesheet adds the hours. Rostered shifts with no hours recorded are listed above the table, so none slip through: see Shifts nobody clocked into.
5. Export for payroll
Export sends the current view: the dates, the filters and any counter you clicked.
- CSV or Excel is a file for any payroll or spreadsheet. It has one row per timesheet with the rostered shift, clock times, unpaid break, hours worked, role, public holiday and status. It includes every status in the view, so click Ready to export first if you only want approved hours. Downloading a file doesn't mark anything as exported.
- Xero, MYOB and Employment Hero / QuickBooks Payroll appear once connected, and send approved timesheets only. For Xero, follow Complete a pay run with Xero.
Related
- Shifts nobody clocked into
- Complete a pay run with Xero
- Set up clock-in - where and how early your team can clock in